Introduction
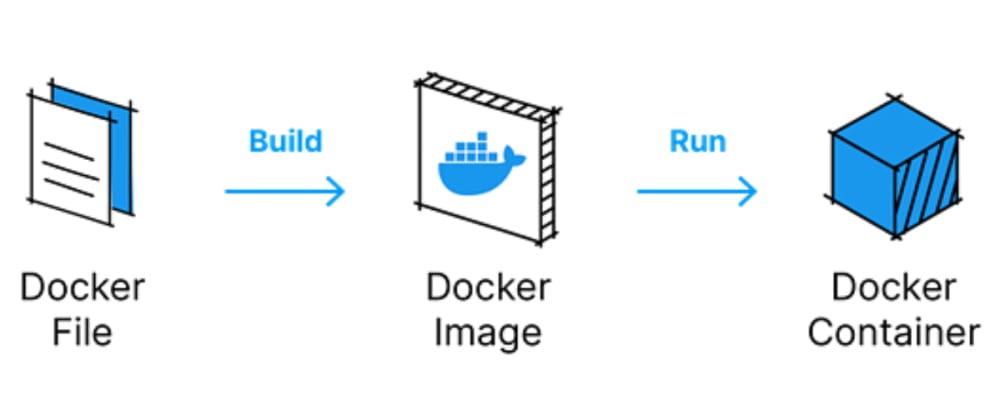
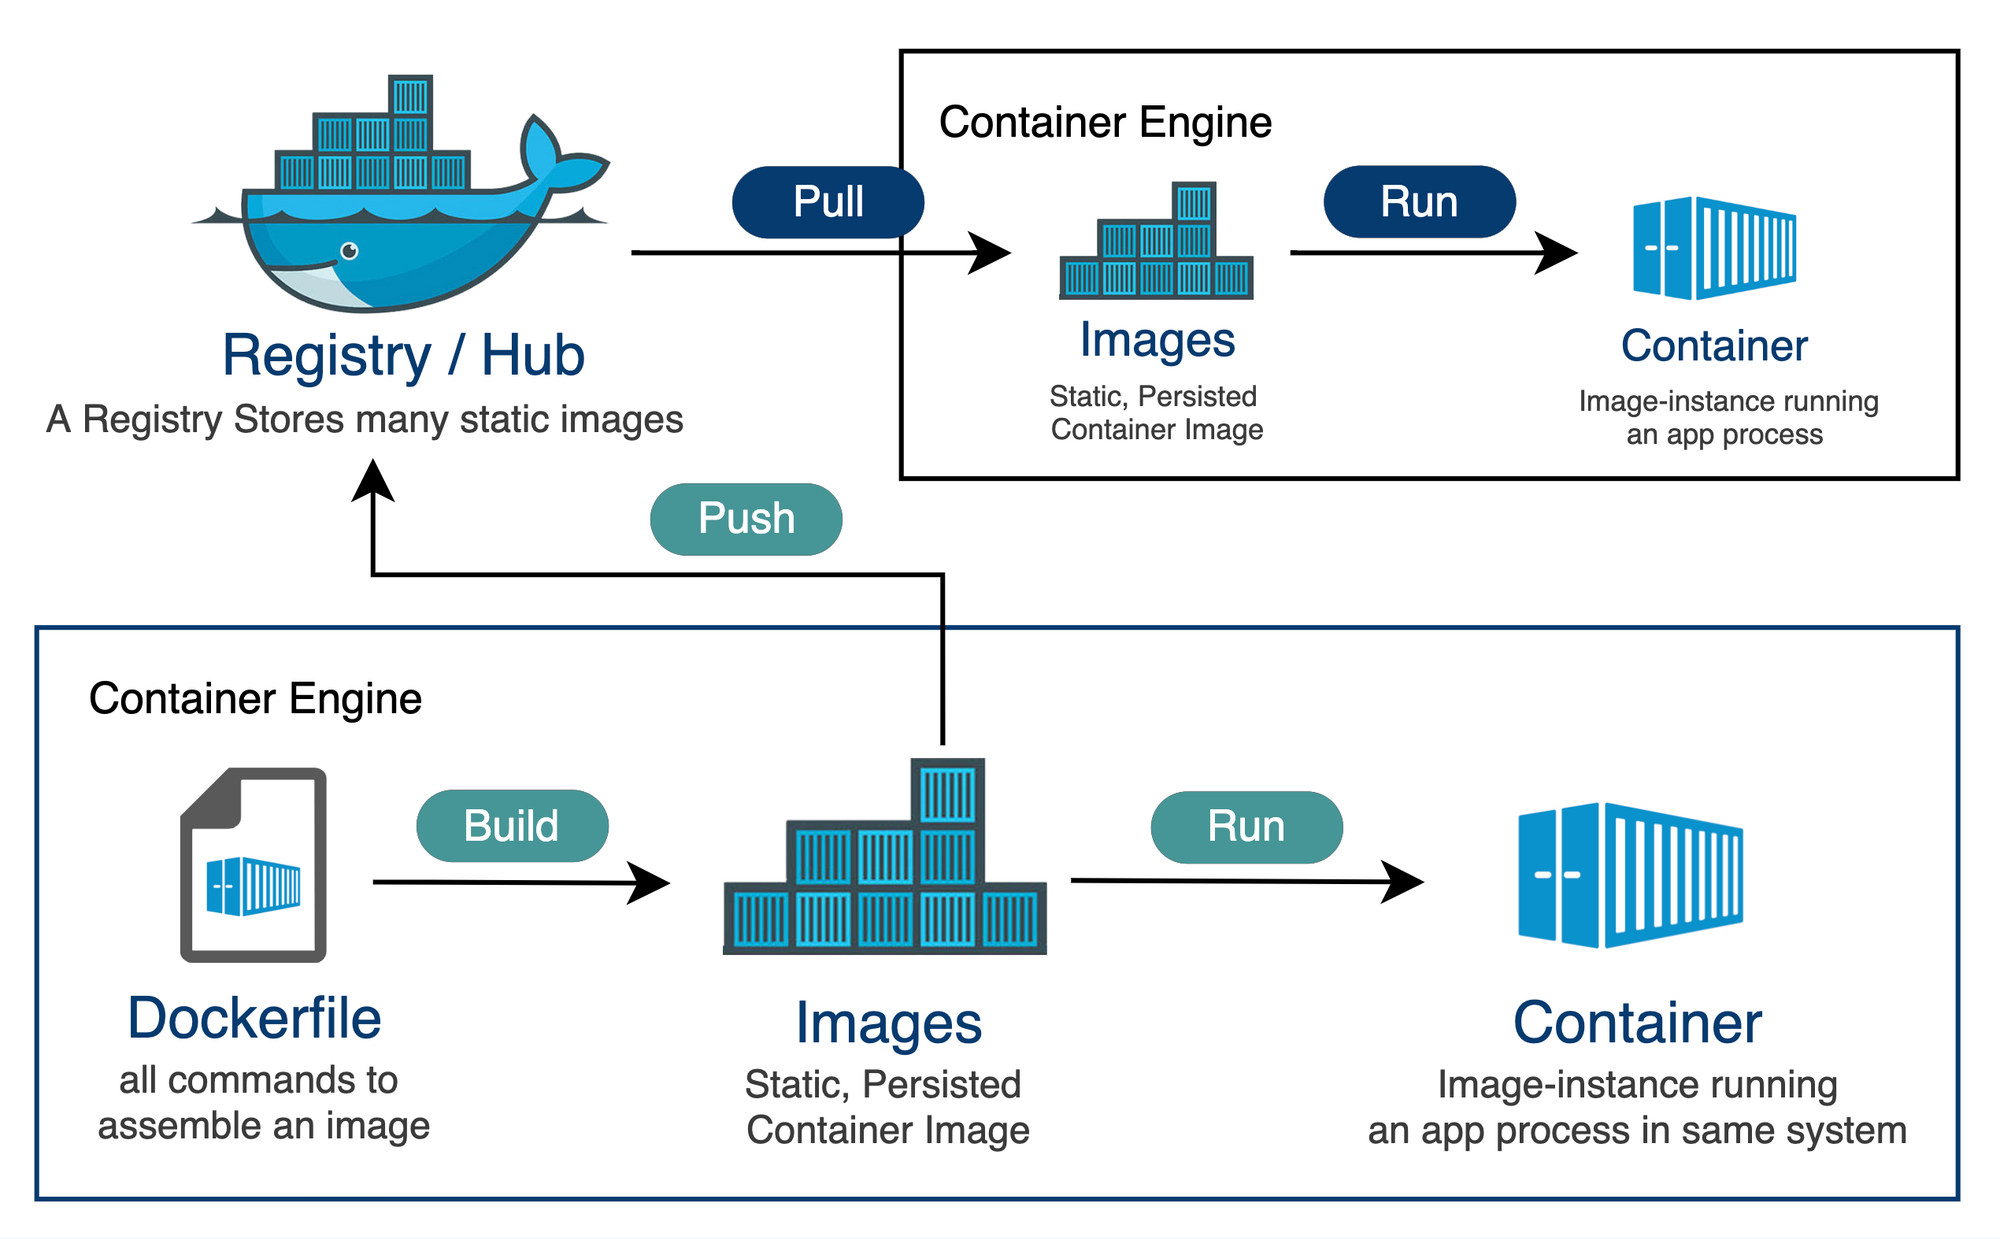
Docker images serve as the foundational building blocks of containerized applications in the Docker ecosystem. An image is essentially a snapshot of an application, encapsulating the application code along with all the dependencies such as libraries, binaries, and the necessary runtime environment. To create an image, Docker relies on a set of instructions provided in a Dockerfile. This Dockerfile is a text document that contains all the commands a user could call on the command line to assemble the image. When Docker processes these instructions, it builds the image in layers.

The layered nature of a Docker image is one of its core strengths. Each layer represents a change in the image, an instruction that modifies the state of the image and is built on top of the previous layer. Think of it like creating an intricate collage, where each new piece of paper is added on top of the last. The benefit of this approach comes into play when these images are stored or transmitted; only the layers that have changed need to be updated or sent over the network, saving both storage and bandwidth.
When you alter the Dockerfile and rebuild the image, Docker only rebuilds those layers that have changed since the last build. This is highly efficient, as it avoids the need to recreate the entire image from scratch. However, this also means that you must carefully consider the order of instructions in your Dockerfile to optimize the build process.
Now, when it comes to identifying and organizing these Docker images, tags come into play. A tag is a label that you assign to an image, which allows you to track different versions of the same image. By default, if you don’t specify a tag, Docker will assign the latest tag to your image, but this can be misleading because latest does not necessarily mean the most recent version; it's just a default tag.
Properly tagging images is crucial for version control and ensuring that the right image is being used in the right place. For instance, it’s common practice to tag images with version numbers, commit hashes, or even environment names like production or test. This level of specificity aids developers and operators in managing deployments, rollbacks, and updates without having to guess which version of the image is needed.
Container Registry

A Docker registry is a stateful, server-side application that stores and lets you distribute Docker images. The registry is a critical component of the containerization lifecycle as it provides a centralized location for storing and versioning images. This centralization facilitates sharing and collaboration across development teams and deployment pipelines.
Think of a registry as a library, and each image as a book in that library. Just as libraries have systems to manage the storage, cataloging, and retrieval of books, a Docker registry handles the images. When developers need to push new images or pull existing ones for deployment or development, they interact with this registry.
Docker provides a public registry called Docker Hub, which hosts a vast array of images for public use. This includes official images for operating systems, databases, and programming languages, among others. However, companies often require a private place to store images that contain proprietary software or configurations. For this purpose, Docker, as well as third-party vendors, offers private registry solutions that can be hosted on-premises or in the cloud.
Repositories
Within a Docker registry, a repository is a collection of Docker images with the same name but different tags. The repository groups all the different versions of the image together and provides a history of the changes made over time. For instance, you could have a repository named my-app, which contains all the different tagged versions of the my-app image, such as my-app:1.0, my-app:2.0, my-app:latest, and so on.
Repositories are especially useful for version control, allowing teams to roll back to previous images if needed and to understand the progression of changes in the software. This is analogous to having different editions or versions of a book within the library.
A Docker repository can be public or private, depending on the level of access control required:
- Public Repositories: These repositories are accessible by anyone. They are typically used to host images that are meant to be shared with the community or provide a starting point for others to build their applications.
- Private Repositories: Access to these repositories is restricted, controlled by user authentication. They are utilized by individuals, teams, or organizations to host proprietary or confidential images that should not be publicly available.
The interplay between a registry and its repositories is at the heart of Docker image storage and distribution. When a user issues a command to pull an image, Docker contacts the configured registry, locates the appropriate repository within it, and then retrieves the image by its tag. Conversely, when pushing an image, the user sends it to a specified repository within a registry, where it is stored for future retrieval.
To ensure the consistency and reliability of these operations, Docker not only manages the images but also takes care of intricate details like network retries, resumable uploads, manifest file creation, and more. This level of management abstracts the complexity from the end-user, making working with Docker images and repositories a seamless experience.
Container Registry Architecture
The technical aspects of a Docker registry encompass how it operates under the hood, including storage backends, security considerations, and networking communication. A deeper understanding of these components will give you a clearer picture of how the Docker registry fits into the container ecosystem.
Storage Backend
At its core, a Docker registry requires a storage backend to save the Docker images and their layers. The storage solution can range from a local filesystem to cloud-based options like AWS S3, Azure Blob Storage, or Google Cloud Storage. The choice of storage impacts factors such as scalability, availability, and performance.
- Local Storage: Simple and quick to set up, but not recommended for scalable, production-grade environments.
- Cloud Storage: Offers better scalability and redundancy. Docker registries that use cloud storage are built to handle high availability and fault tolerance, leveraging the cloud provider's infrastructure.
Security Considerations
Securing a Docker registry is critical because it can store sensitive proprietary code:
- Authentication: Registries often integrate with standard authentication mechanisms like LDAP or OAuth to control who can push or pull images.
- Authorization: Fine-grained access control can be implemented to define who has read or write access to specific repositories within the registry.
- Transport Security: Communication with a registry should be over HTTPS to prevent man-in-the-middle attacks. This ensures that image data is encrypted in transit.
- Image Signing and Verification: Docker Content Trust allows for the signing of images so that users can verify the integrity and publisher of the data. This prevents the deployment of unauthorized or tampered images.
- Vulnerability Scanning: Many registries, including Docker Hub, offer vulnerability scanning features to detect known security issues within images and layers before deployment.
Networking
A Docker registry communicates over standard HTTP/HTTPS protocols. When you issue a pull or push command, Docker sends a RESTful API request to the registry server:
- Pull: The Docker engine requests an image manifest by tag or digest. The manifest contains information about the image layers. The engine then downloads the layers that are not present locally.
- Push: The engine uploads each layer that does not exist in the registry and finally sends the image manifest to be stored by the registry.
Image Management and Distribution
The registry uses manifests to manage and distribute Docker images:
- Manifests: A Docker image manifest specifies the image's layers, the configuration, and the digest. When you pull an image, Docker uses the manifest to verify and pull all layers.
- Tags and Digests: Tags provide human-readable aliases to the image manifests, while digests provide a unique identifier for a particular version of an image, ensuring immutability.
Scalability
To handle a large number of requests, a Docker registry can be scaled horizontally by adding more instances behind a Load Balancer. This is especially important for registries that serve large numbers of users or handle CI/CD workflows with frequent image pushes and pulls.
Registry Webhooks
Some Docker registries support Webhooks, which are triggers that notify other applications or services when certain actions occur in the registry, like pushing a new image. This can be utilized to integrate with continuous integration pipelines or for notification systems.
Logging and Monitoring
Keeping track of activities in the Docker registry is important for auditing and troubleshooting. A Docker registry typically logs events such as user authentication, image pushes/pulls, and backend storage operations. Monitoring these logs can be crucial for maintaining the health and security of the registry.
Docker Distribution vs Harbor vs Quay
Docker Registry, Harbor, Dockyard, and Quay are different solutions for storing and managing Docker images. Here's a comparative analysis of each tool based on various factors:
| Feature/Aspect | Docker Registry | Harbor | Quay (Red Hat) |
|---|---|---|---|
| Open Source | Yes | Yes | Yes (There is also a proprietary version) |
| Core Functionality | Image storage and distribution | Image storage, replication, and distribution | Image storage, replication, and distribution |
| User Interface | None (CLI only) | Web UI | Web UI |
| Security | Basic SSL/TLS support | Role-based access control, image scanning | Security scanning, RBAC, security notifications |
| Image Scanning for Vulnerabilities | No | Yes (Clair) | Yes (Clair) |
| Content Trust (Signing) | No (Can be added with Notary) | Yes | Yes |
| Georeplication | No | Yes | Yes |
| High Availability | Possible with additional setup | Yes | Yes |
| Storage Backends | Local filesystem, S3, Azure, GCS, and others | Local filesystem, S3, Azure, GCS, and others | Local filesystem, S3, Swift, and others |
| Authentication/Authorization | Token based (integration needed for advanced features) | Built-in, integrates with LDAP/AD, OIDC | Built-in, integrates with LDAP/AD, OIDC |
| CI/CD Integration | Yes | Yes | Yes |
| Cloud-Native Support | Basic | Helm chart for Kubernetes, Notary integration | Helm chart for Kubernetes, Notary integration |
| Notifications/Webhooks | Yes | Yes | Yes |
| Logging/Monitoring | Basic (integration with external tools required) | Yes (also integrates with external tools) | Yes (also integrates with external tools) |
| Registry/Repository Management | Basic | Advanced (with RBAC and quotas) | Advanced (with RBAC and team management) |
| API | Yes | Yes | Yes |
| Community and Support | Docker community | CNCF Project with strong community | Red Hat and community support |
| Enterprise Features | No | Yes | Yes (in the proprietary version) |
Docker Distribution

Docker Distribution is the basic, open-source registry server provided by Docker Inc. that stores and distributes Docker images. It supports the standard Docker image format and allows for simple push and pull functionalities. It integrates well with the Docker CLI and other Docker ecosystem tools.
It offers a starting point for storage and retrieval of Docker images but comes with minimal features out of the box, relying on external tools for advanced functionality like user interface, access control, and image scanning. It can be scaled horizontally; however, it requires additional setup like a Load Balancer and Backend storage configuration.
Harbor

Harbor is an open-source cloud-native registry that stores, signs, and scans content. It provides advanced features like role-based access control, image replication, and vulnerability scanning. Harbor includes a user-friendly web interface for repository management, which is not provided by the basic Docker Registry.
It allows administrators to set quotas on resources used by projects, helping in managing the storage capacity. Harbor can be integrated into CI/CD pipelines and supports container image scanning for security vulnerabilities.
Quay

Quay is developed by Redhat, designed with enterprise needs in mind, offering robust security features, high availability, and the possibility of on-premise deployment. It includes security scanning, vulnerability detection, and governance features that are essential for enterprise environments.
Quay supports georeplication, allowing images to be replicated across multiple geographical locations for reduced latency and high availability. Quay provides a rich set of APIs for automation and can be integrated into CI/CD workflows and Kubernetes. It has a polished web UI for managing repositories, teams, and permissions.
Install Docker Distribution on Kubernetes
Installing Distribution on Kubernetes is quite straightforward. An official Docker image is available for this purpose. Additionally, there is a user-friendly web-based dashboard that simplifies the management of Distribution.
Preparation
We will install both the Distribution server and its dashboard using Helm charts, so you must have Helm installed on your machine. For the Helm chart templates, we will utilize those provided by '8gears' available at 8gears/microk8s-helm-chart. Please ensure you have downloaded the necessary files from this repository.
~$ git clone git@github.com:8grams/microk8s-helm-chart.git charts/generalWe also need a basic authentication using htpasswd, for example we will create basic auth with username: admin and password: admin.
~$ htpasswd -c auth admin
New password: <Enter your password, e.g admin>
Re-type new password: <Enter your password, e.g admin>
It will generate a file auth and you can see it
~$ cat auth
admin:$apr1$t/jfFJ08$r6hAbIBaMJoSP/5lb4qT91
Override Helm Chart Template
Create two files values-server.yaml for Distribution server:
and values-dashboard.yaml for Registry Dashboard UI:
Install Distribution
Install it with helm
~$ helm install registry ./charts/general -n registry -f values-server.yaml --create-namespace

~$ helm install registry-ui ./charts/general -n registry -f values-dashboard.yaml
Check the installation
~$ kubectl -n registry get deployment
NAME                          READY   UP-TO-DATE   AVAILABLE   AGE
registry-general              1/1     1            1           5m
registry-dashboard-general    1/1     1            1           3m
Looks good! Now we can access Registry Dashboard UI from https://registry-dashboard.example.com, it will show popup menu request us to fill username and password, which is username: admin and password: admin in this example.
Using Docker Distribution
Now, we ready to use Distribution to store our container. For example we can use this repo: https://github.com/8grams/caddy-example.
First, clone it
~$ git clone git@github.com:8grams/caddy-example.gitBuild image from this repository
~$ cd caddy-example
~$ docker build . -t caddy-example
Login to your own Docker Distribution
~$ docker login -u admin -p admin registry.example.com
~$ docker push registry.example.com/example/caddy-example:latest
Additionally, you can pull your container image from your own Docker Registry
~$ docker run -p 80:80 registry.example.com/example/caddy-example:latestVoilà! You are now able to store Docker images in your own Docker Registry, which is hosted within your Kubernetes cluster.

